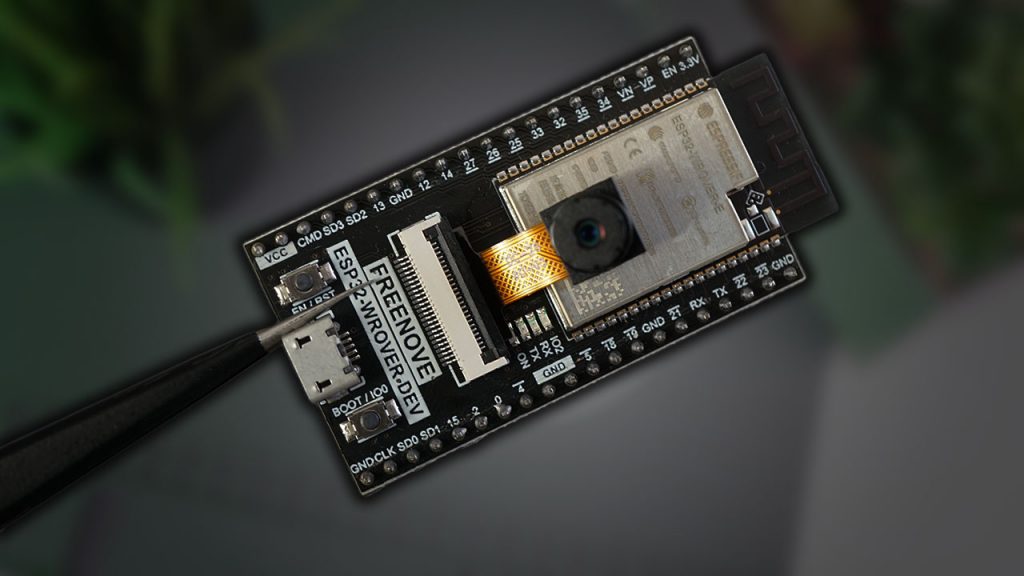
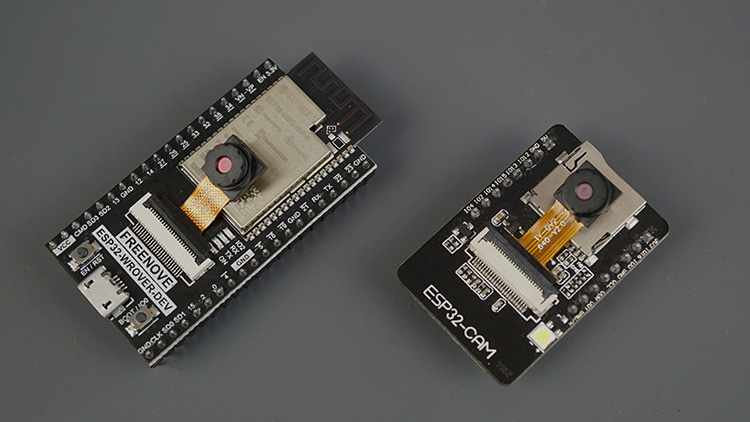
In this article, we’ll take a look at the Freenove ESP32-Wrover CAM board. This is a new ESP32 development board that features an ESP32-wrover chip, an OV2640 camera, several GPIOs to connect peripherals, and micro-USB interface.
Where to Buy Freenove ESP32-Wrover CAM Board?
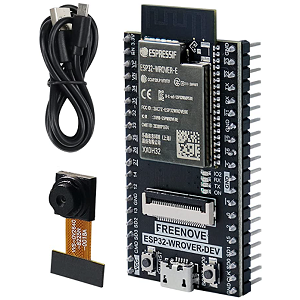
You can get a Freenove ESP32 Camera board from Amazon. Check the following links:

Amazon.com - FREENOVE ESP32-WROVER CAM Board

Freenove ESP32-Wrover CAM Board Overview
The Freenove ESP32-Wrover CAM board is a relatively recent ESP32 development board. This board comes with the ESP32-Wrover chip, a connection to an OV2640 camera, multiple GPIOs to connect peripherals, a built-in programmer with a USB connector, onboard BOOT and RESET buttons and several state LEDs.
Here’s a summary of the Freenove ESP32-Wrover CAM board features:
- ESP32-Wrover-E Chip with 4MB PSRAM
- Built-in USB-to-UART (CH340C drivers) — no need for an FTDI programmer
- Camera OV2640 2 Megapixel
- BOOT and RST buttons
- LED indicators (RX/TX ON/OFF, and built-in LED (GPIO2))
- Onboard antenna
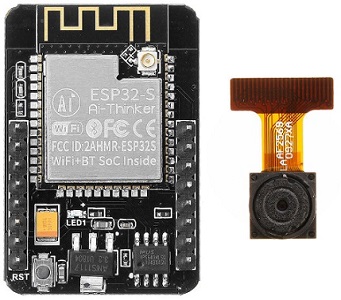
This board might be a better alternative to the widely used AI-Thinker ESP32-CAM because it provides an easier way to upload code (you only need to connect a USB cable to the board and connect it to your computer), and it comes with more GPIOs to connect peripherals. The only downside comparing it with the ESP32-CAM AI-Thinker is that it doesn’t come with a microSD card slot. However, a more recent version of this board already comes with that and other features. You can check that new version of the board on the link below.

We’ll get one of those boards soon, and write a review about it.
Now, let’s take a closer look at the Freenove ESP32-CAM board.
ESP32-Wrover Chip
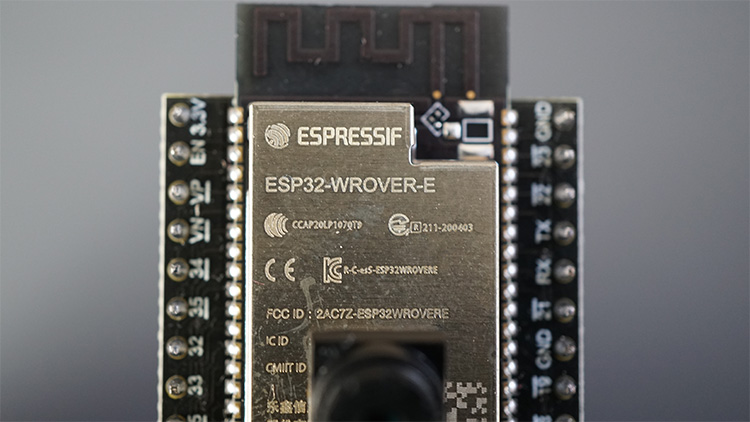
The Freenove ESP32-Wrover CAM board is an ESP32 development board with the ESP32-Wrover-E chip (with 4 MB PSRAM). This is a widely used chip in many ESP32 development boards.
OV2640 camera
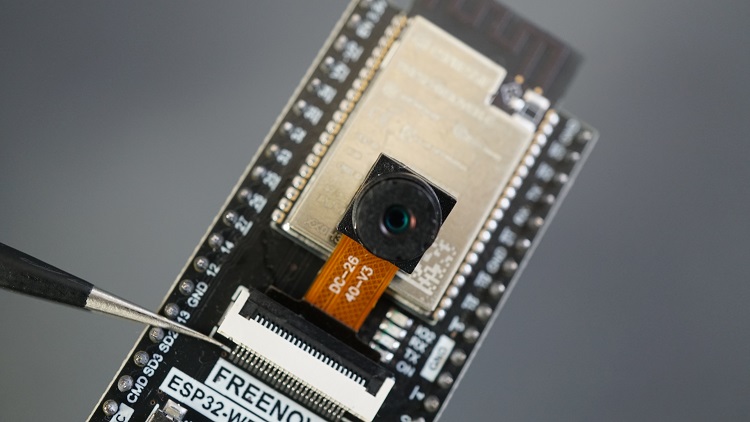
The board comes with an OV2640 camera. This is the same camera used in the ESP32-CAM Ai-Thinker and other ESP32 development boards with a camera. This means that most projects for the ESP32-CAM AI-Thinker are also compatible with the Freenove ESP32 camera board with small adjustments in the pin assignment in the code.
USB-to-UART converter
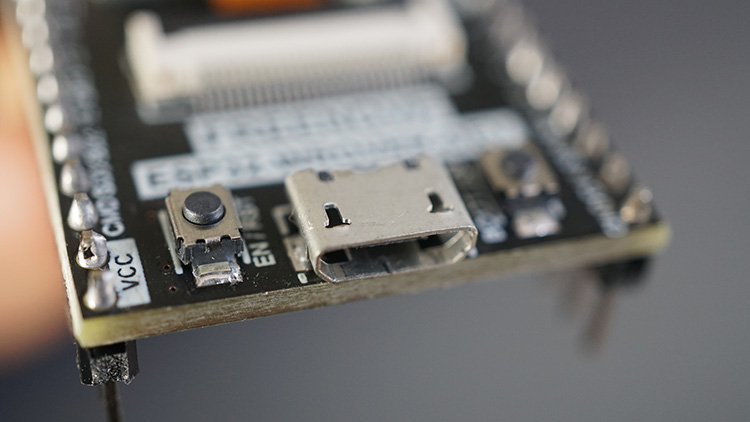
Contrary to other ESP32 camera development boards, the Freenove ESP32-CAMcomes with a USB-to-UART converter and uses the CH340C drivers (you might need to install those drivers on your computer to be able to program the board). This feature is very handy because you can easily upload the code to the board. You only need a micro USB cable to connect your board to the computer and you’re ready to go. You don’t need an FTDI programmer or adapter boards.
Multiple GPIOs
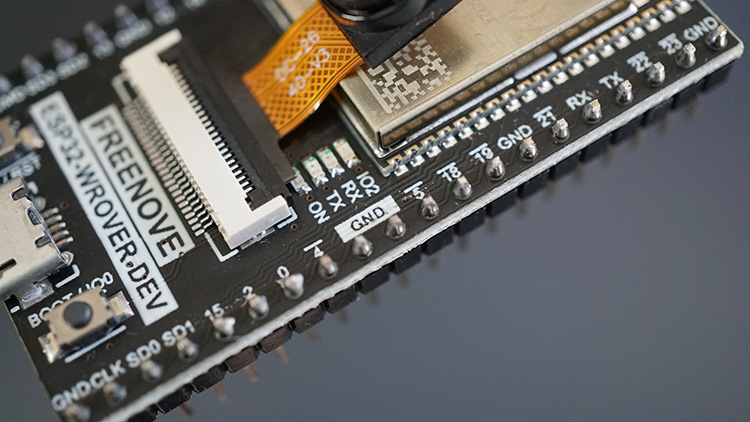
The Freenove ESP32 camera board comes with several exposed GPIOs if you want to connect other peripherals like sensors and outputs (many more GPIOs than the ESP32-CAM AI-Thinker). If don’t use the camera, you can use it as a regular ESP32 with a wide number of available GPIOs.
BOOT and RESET Buttons
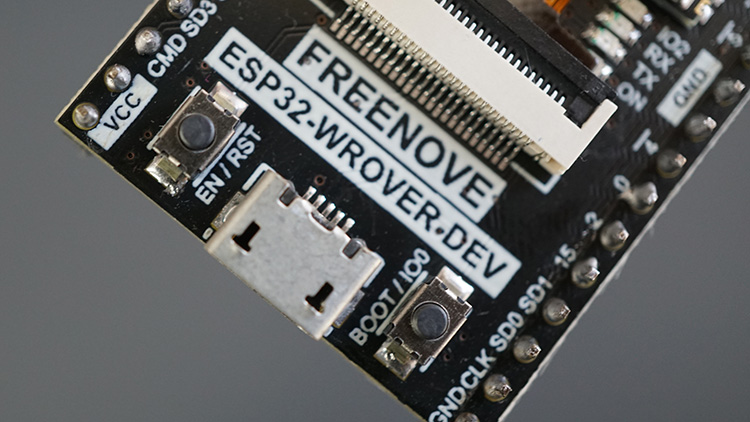
There are RESET and BOOT buttons, which makes it easy to reset the board or put it in flashing mode if needed.
Onboard LEDs
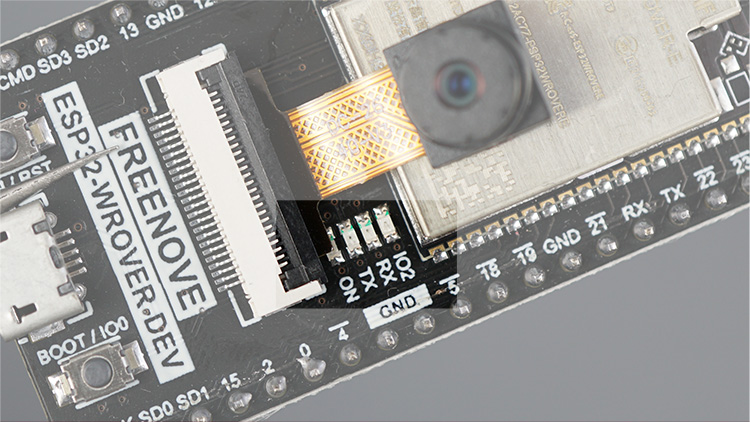
The board comes with four onboard LEDs with different meanings:
- ON: when lit, it means the board is being powered on.
- RX/TX: will blink when you’re using serial communication.
- IO2: it’s a built-in LED connected to GPIO 2—useful for debugging purposes.
Freenove ESP32-Wrover CAM Board Pinout
The following diagram shows the pinout for the ESP32-Wrover CAM board. You can click on the image to enlarge it.
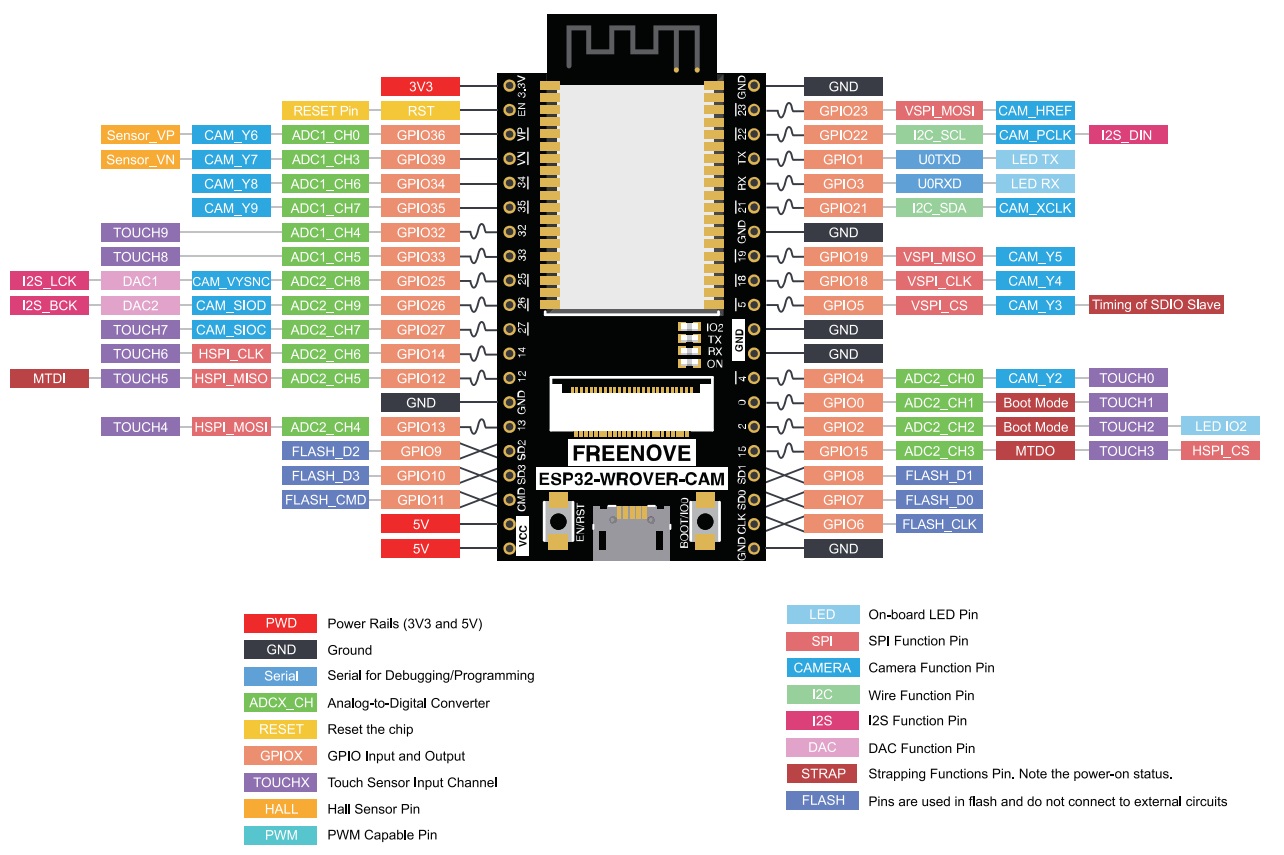
The labels on the picture indicate the features of each pin. You can clearly see which pins are being used by the camera, the power pins, PWM pins, ADC pins, etc.
Freenove ESP32-Wrover CAM Board – Camera Pin Definition
Here’s a table with the connections between the ESP32 and the camera:
| OV2640 Camera | ESP32 |
| XCLK | GPIO 21 |
| SIOD | GPIO 26 |
| SIOC | GPIO 27 |
| Y9 | GPIO 35 |
| Y8 | GPIO 34 |
| Y7 | GPIO 39 |
| Y6 | GPIO 36 |
| Y5 | GPIO 19 |
| Y4 | GPIO 18 |
| Y3 | GPIO 5 |
| Y2 | GPIO 4 |
| VSYNC | GPIO 25 |
| HREF | GPIO 23 |
| PCLK | GPIO 22 |
Note that when you’re using the camera, you can’t connect peripherals to the GPIOs used by the camera. Otherwise, the camera won’t work properly. When you’re not using the camera, you can use this ESP32 board as a “regular” ESP32 and you can use the camera pins for other purposes.
Freenove ESP32-Wrover CAM vs ESP32-CAM Ai-Thinker
Is the Freenove ESP32-Wrover Cam better than the ESP32-CAM AI-Thinker? It will depend on your project requirements, but in my opinion, the Freenove ESP32-Wrover CAM board is better. Let’s compare those boards.
ESP32 Chip
Both the ESP32-CAM Ai-Thinker and the Freenove ESP32 Camera come with an ESP32 chip. The AI-Thinker boards usually come with the ESP32-S chip, and the Freenove brand comes with the ESP32-Wrover-E. Both chips are similar in terms of performance.
OV2640 Camera
They both have the same camera model, an OV2640 camera. This means that most projects for the ESP32 Ai-Thinker will also work with the Freenove board and vice-versa by just changing the pin assignment in the code.
microSD Card
The ESP32-CAM Ai-Thinker comes with a built-in microSD card slot, while the Freenove doesn’t. The Freenove comes with more accessible GPIOs than the Ai-Thinker, including GPIOs being used by the camera. This means that when you’re not using the camera, you have more GPIOs to use, almost as in a regular ESP32 board. If you intend to use a microSD card in your projects, maybe the ESP32-CAM is a better idea. However, you can easily connect a microSD card module to the Freenove because it comes with several available GPIOs.
BOOT and RESET Buttons
The Freenove comes with BOOT, and RESET buttons, while most ESP32-CAM Ai-Thinker boards only come with RESET button.
Onboard LEDs
The Freenove comes with built-in indicator LEDs, and the Ai-Tinker doesn’t. So, in theory, the ESP32-CAM Ai-Thinker should be better in terms of power consumption, even though I haven’t tested it.
Built-in Programmer
The Freenove comes with a built-in USB to TTL converter, which means you can easily upload code to the board and provide power through the USB socket. The AI-Thinker board doesn’t come with this feature, which is a big drawback when you’re experimenting with code and debugging—uploading code can become a tedious task.
Wi-Fi Antenna
The Freenove comes with an onboard antenna, while the Ai-Tinker is available with an onboard antenna and with the possibility to connect an external antenna to increase the wi-fi range.
Freenove ESP32-Wrover CAM vs ESP32-CAM Ai-Thinker Comparison Table
For a better comparison between the ESP32-CAM AI-Thinker and the Freenove ESP32-Wrover CAM, check the table below.
| Freenove ESP32-Wrover CAM | ESP32-CAM AI-Thinker | |
 |  | |
| Chip | ESP32-Wrover-E | ESP32-S |
| PSRAM | 4MB | 4MB |
| Exposed GPIOs | 30 | 6 |
| Built-in programmer | ✓ | x |
| Antenna | Onboard | Onboard and external |
| Indicator LEDs | ✓ | x |
| Where to buy? | Amazon.com | Amazon.com Banggood |
Programming the ESP32-Wrover CAM board
The Freenove ESP32-Wrover CAM board can be programmed using the Arduino core for the ESP32 (using Arduino IDE) and Micropython. We have a tutorial explaining how to program the Freenove ESP32-Wrover CAM board using Arduino IDE:
The Freenove website also provides examples using MicroPython firmware.
Because this board uses the same camera used in the AI-Thinker ESP32-CAM board, the examples for the ESP32-CAM (that don’t use microSD card) should also work with the Freenove ESP32 Camera board by changing the pin definition. The examples that use a microSD card, should also be compatible if using an external microSD card module and adjusting the pin definition on the code.
Wrapping Up
In this article, we took a detailed look at the Freenove ESP32-Wrover CAM board. In our opinion, the Freenove ESP32-Wrover CAM board is one of the best ESP32 camera development boards for beginners. If you want to compare it with other ESP32 camera boards, read this article: ESP32 Camera Dev Boards Review and Comparison (Best ESP32-CAM).
We hope you’ve found this review useful. You may also like the following resources:
- Getting Started with the Freenove ESP32-Wrover CAM Board
- ESP32-CAM Camera Boards: Pin and GPIOs Assignment Guide
- Build ESP32-CAM Projects (eBook)
- Read all our ESP32-CAM Projects, Tutorials and Guides
Thanks for reading.
[Recommended Course] Learn ESP32 with Arduino IDE
Register in our brand new ESP32 course with Arduino IDE. This is our complete guide to program the ESP32 with Arduino IDE, including projects, tips, and tricks! The registrations are open, so sign up now.
 [eBook] Home Automation using ESP8266 »
 [Course] Build a Home Automation System »
 [Course] Arduino Step-by-Step Projects »
Leave a Reply