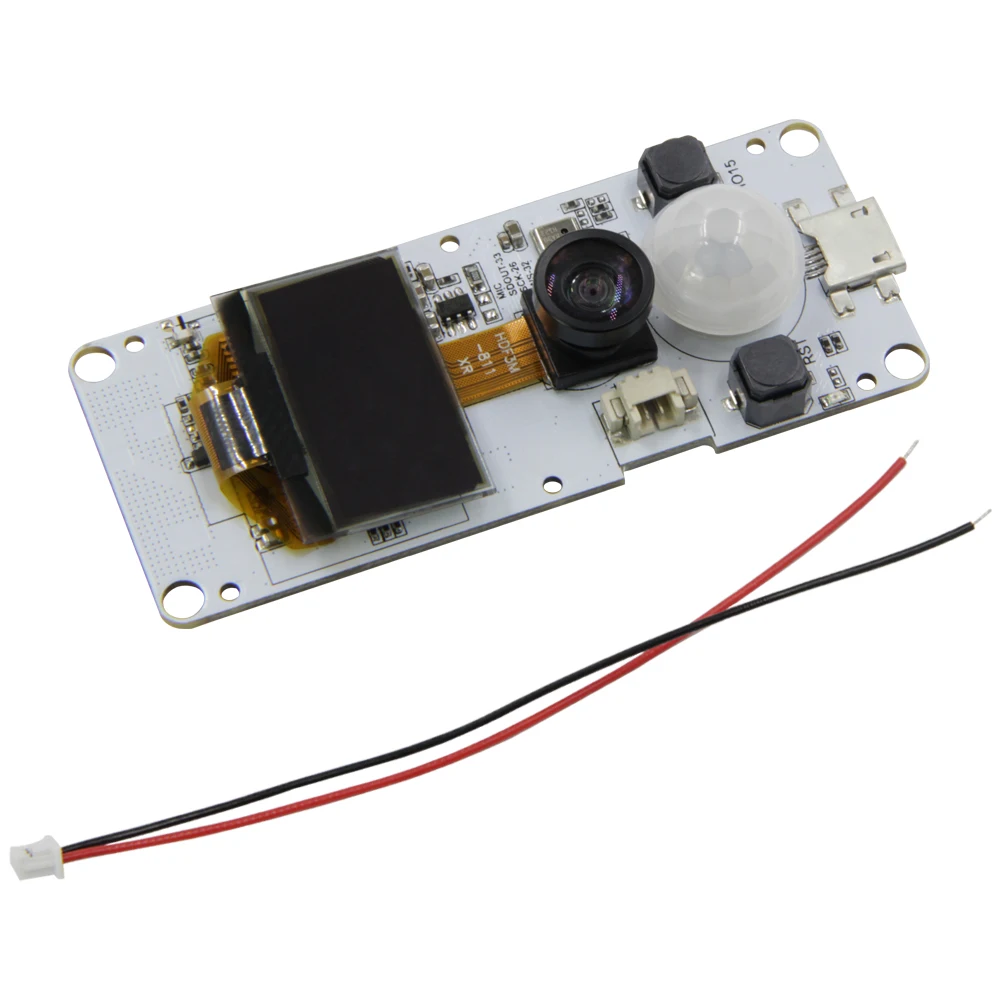
In this article, we’re going to take a look at another ESP32 Camera Development board: the ESP32 TTGO T-Camera with a PIR sensor and OLED display.
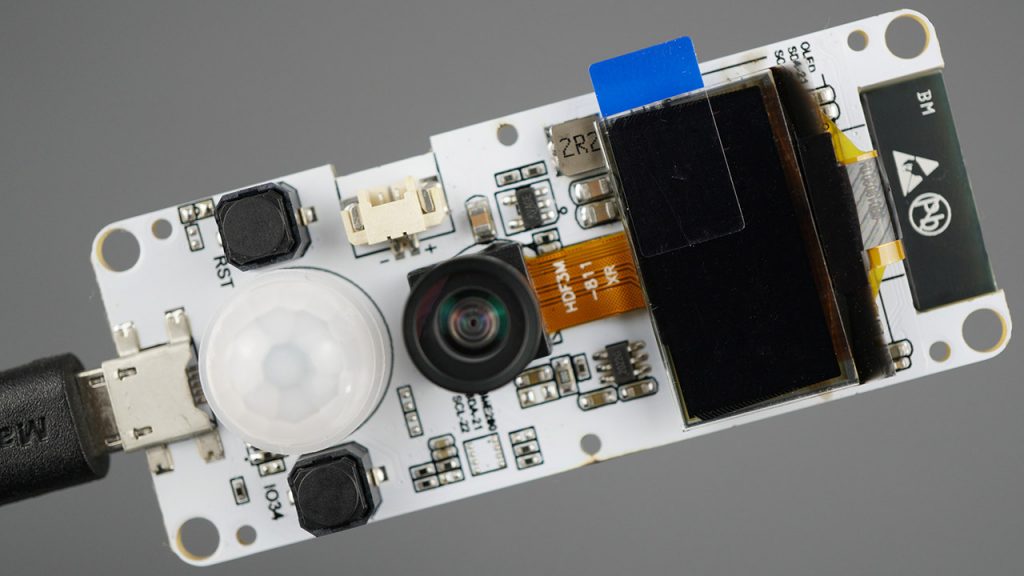
This board features an OV2640 camera, a 0.96 inch SSD1306 OLED display, a 5 pin JST connector with exposed I2C pins, a battery connector, a PIR motion sensor, on‑board RESET button, and a function button connected to GPIO 34. Finally, it also has a micro-USB interface that makes it easy and quick to upload code to the board. The board doesn’t support microSD card.
Where to Buy?
You can get the TTGO T-Camera ESP32 with PIR and OLED display for approximately $13 on Banggood.
Banggood - TTGO T-Camera with PIR sensor and OLED Display
If you prefer, you can also get it on the stores below.


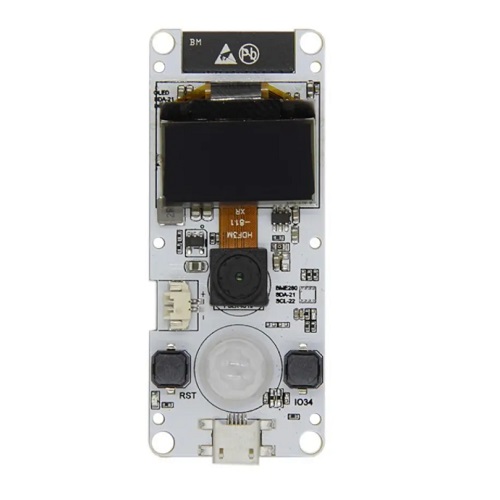
TTGO T-Camera with PIR sensor and OLED Display Board Overview
The board comes inside a small plastic box with the pinout. Inside, you’ll find the camera board and a small connector for the battery.
Here’s a summary of the most relevant hardware specifications:
- Chip: ESP32-WROVER-B
- Protocol: Wi-Fi 802.11 b/g/n & bluetooth 4.2 BLE & BR/EDR
- Flash: 4MB
- PSRAM: 8MB
- Display chip: SSD1306 I2C
- Display type: OLED
- Display resolution: 128×64
- PIR: AS312
- UART chip: CP2104
- Charging chip: IP5306 I2C
- Camera: OV2640
- Camera Resolution: 2 Megapixel
Power supply specifications:
- Power supply: USB 5V/1A
- Battery: 3.7V lithium battery
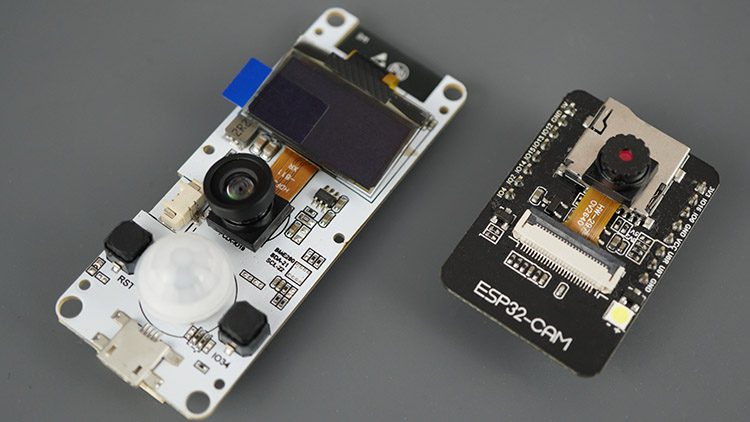
OV2640 Camera
The following figure shows the OV2640 camera that comes with the board.
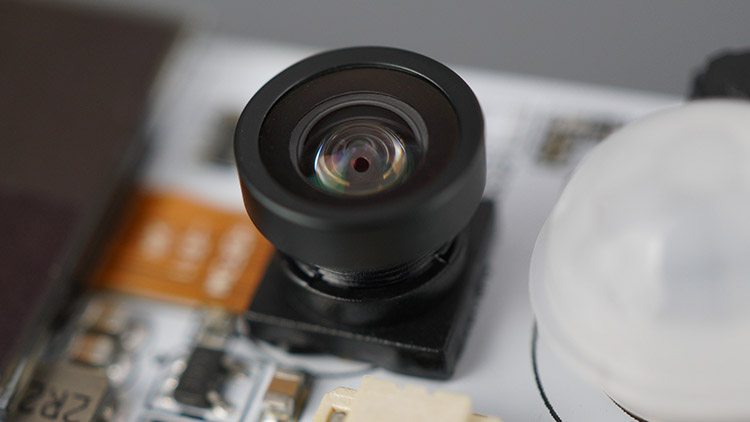
It is the same camera of the ESP32-CAM AI-Thinker board and other similar ESP32 camera development boards. When you get the board, you can choose between the regular camera and the fish-eye camera. We got the one with fish-eye camera.
SSD1306 0.96inch OLED Display
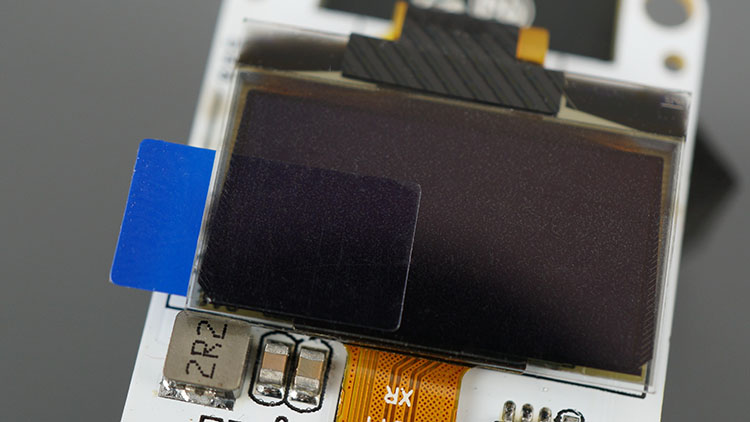
This board comes equipped with a 0.96 inch SSD1306 OLED display. The OLED display comes with the SSD1306 driver, which means you can use the Adafruit SSD1306 or the oled-ssd1306 libraries.
The OLED communicates with the ESP32 using the I2C communication protocol on GPIO 21 (SDA) and GPIO 22 (SCL). These are the default ESP32 I2C pins, so you can use the OLED examples for the ESP32 in this board without making any changes.
You can read our guides for the OLED display with the ESP32:
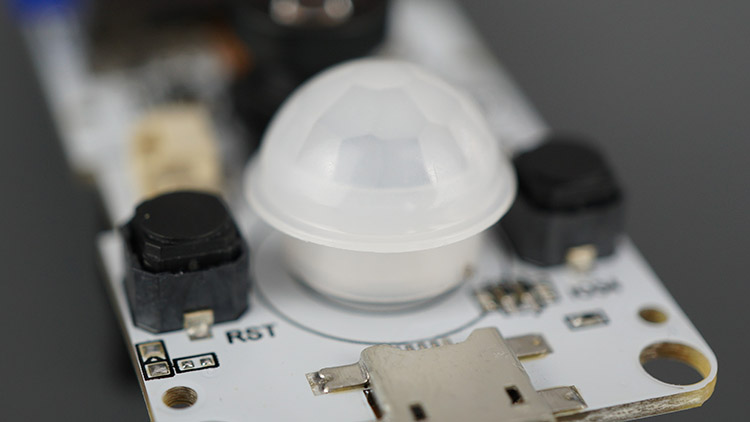
PIR Motion Sensor
The PIR motion sensor data pin is connected to GPIO 333. You can set an interrupt on GPIO 33 that triggers something (like taking a photo or send notifications) when motion is detected.
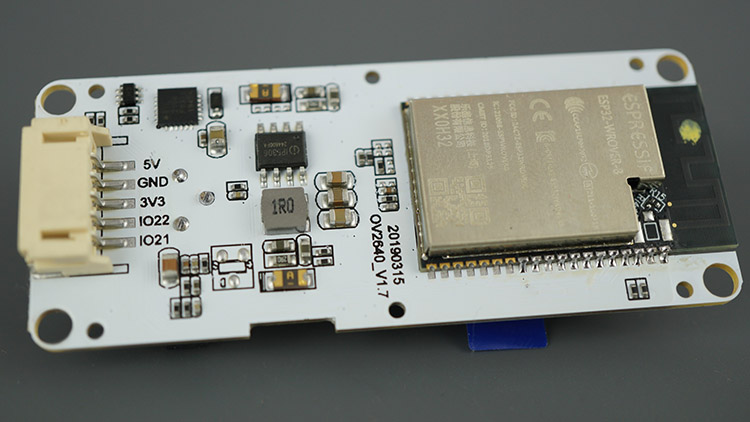
GPIOs (5 Pin JST Connector)
Behind the microUSB connector, there’s a 5 pin JST connector that allows you to access the I2C pins (GPIO 21 and GPIO 22). You can use multiple peripherals on the same I2C pins as long as they have different I2C addresses. This makes it possible, for example, to use the I2C OLED and a sensor like the BME280 at the same time.
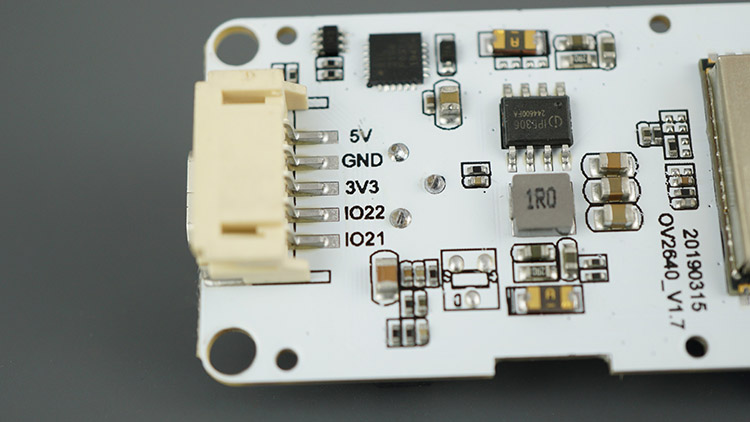
Besides access to the I2C pins, you also have a 5V and 3.3V power source.
Power Supply
The board can be powered via USB cable using a 5V power source, or you use the battery connector and use a 3.7V lithium battery.
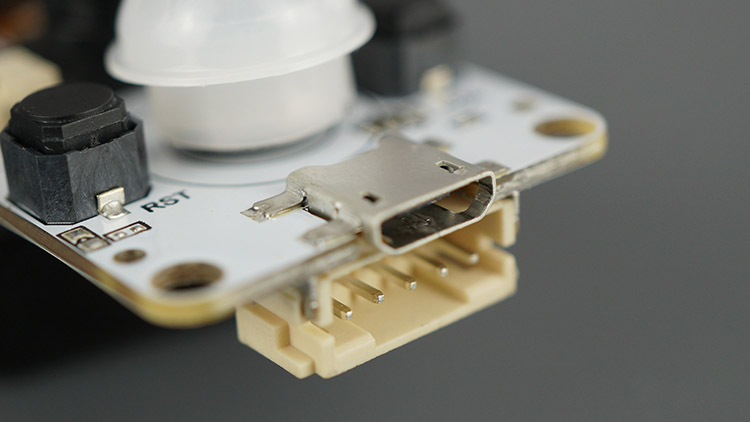
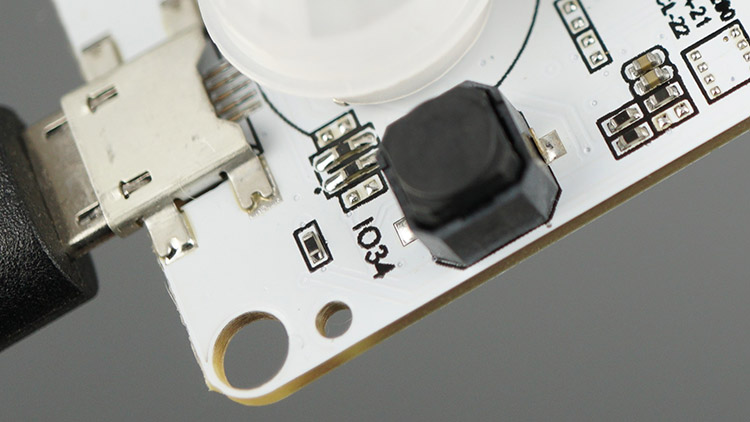
Buttons
The board comes with two buttons: one RESET button and a button connected to GPIO 34. The RESET button resets the board. The button connected to GPIO 34 can be very useful if you want to use it to trigger any task.
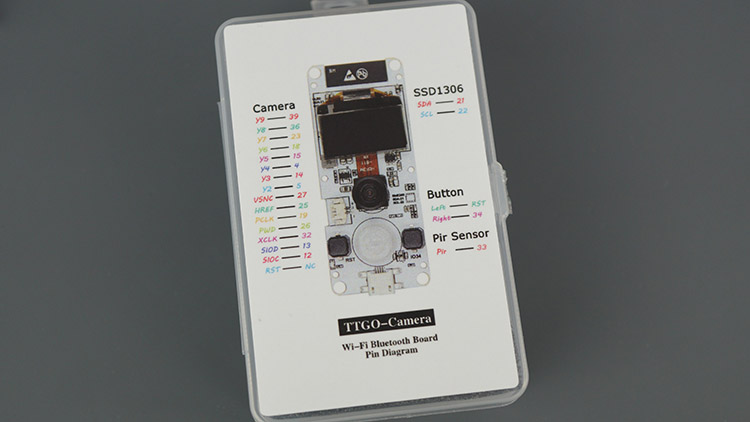
Board Pinout
The following image shows the pinout for the TTGO T-Camera with PIR and OLED display.
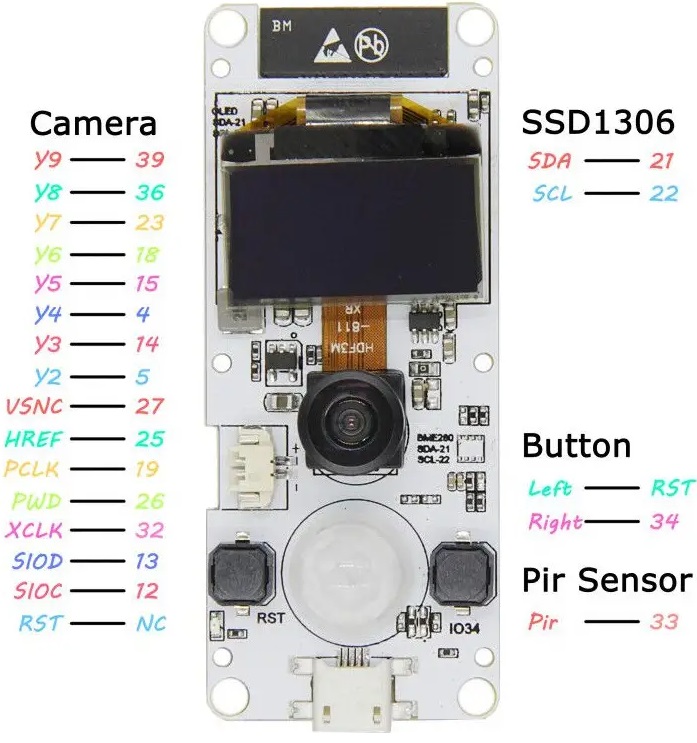
Note that there is another version of this board that supports a microphone and a BME280 sensor. The pinout for that board is completely different from this one. So, make sure you know exactly the board you’re using.
Recommended reading: ESP32-CAM Camera Boards: Pin and GPIOs Assignment Guide
ESP32 Board Camera Connections
Here’s the connections between the ESP32 and the camera:
| OV2640 Camera | ESP32 |
| Y9 | GPIO 39 |
| Y8 | GPIO 36 |
| Y7 | GPIO 23 |
| Y6 | GPIO 18 |
| Y5 | GPIO 15 |
| Y4 | GPIO 4 |
| Y3 | GPIO 14 |
| Y2 | GPIO 5 |
| VSYNC | GPIO 27 |
| HREF | GPIO 25 |
| PCLK | GPIO 19 |
| PWD | GPIO 26 |
| XCLK | GPIO 32 |
| SIOD | GPIO 13 |
| SIOC | GPIO 12 |
| RST | not connected (-1) |
It’s important to make sure that the pin definition in your code matches your camera board pinout. Otherwise, your camera will not work.
OLED Connections
The OLED that comes with this board uses the I2C communication protocol. It communicates with the ESP32 using the default I2C pins:
| OLED | ESP32 |
| SDA | GPIO 21 |
| SCL | GPIO 22 |
PIR Motion Sensor Connections
The PIR motion sensor data pin is connected to GPIO 33.
| PIR Sensor | ESP32 |
| Data Pin | GPIP 33 |
Testing the ESP32 TTGO T-Camera
This camera board comes loaded with a video streaming example. It creates an access point that you can access on your smartphone or computer to watch the video. It is the same sample video streaming web server example that we use with the ESP32-CAM AI-Thinker.
Power the ESP32 through the USB cable (you can just connect it to a USB port in your computer for testing purposes). Go to your smartphone Wi-Fi settings, and there should be an ESP32 wireless network. Connect to that network.
Then, in your smartphone go to the IP address that shows up on the OLED display: http://2.2.2.1
You should get access to the video streaming web server.
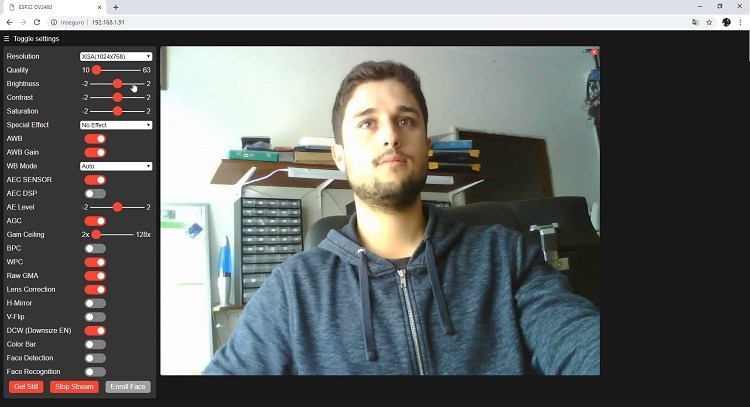
Note: we’ve flashed the camera with a new example before taking pictures. The previous image is from another camera, but it runs the same project that is loaded in the TTGO T-Camera with PIR and OLED display.
Getting Started with the ESP32 TTGO T-Camera with PIR and OLED
Like the ESP32-CAM (AI-Thinker), this board can be programmed using Arduino IDE.
Both boards use the OV2640 camera, so the ESP32-CAM projects (that don’t use SD card) should be compatible with this board. You just need to change the camera pins definition. Use the following pin definition for this board:
define PWDN_GPIO_NUM -1
define RESET_GPIO_NUM -1
define XCLK_GPIO_NUM 32
define SIOD_GPIO_NUM 13
define SIOC_GPIO_NUM 12
define Y9_GPIO_NUM 39
define Y8_GPIO_NUM 36
define Y7_GPIO_NUM 23
define Y6_GPIO_NUM 18
define Y5_GPIO_NUM 15
define Y4_GPIO_NUM 4
define Y3_GPIO_NUM 14
define Y2_GPIO_NUM 5
define VSYNC_GPIO_NUM 27
define HREF_GPIO_NUM 25
define PCLK_GPIO_NUM 19
The OLED display is connected to the ESP32 default I2C pins, so, you can follow our OLED tutorials for the ESP32, and they will work straight away:
You can take a look at all our projects with the ESP32-CAM in the links below:
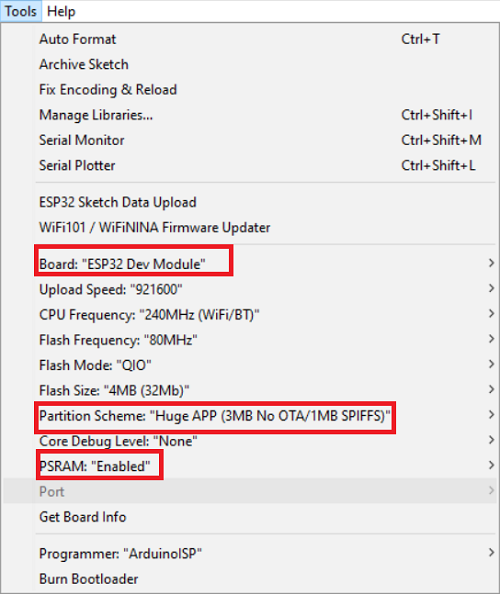
To upload code to this board in your Arduino IDE, you can select the following settings in the Tools menu.
ESP32 TTGO T-Camera vs ESP32-CAM AI-Thinker
The most popular and cheap ESP32-CAM model is the AI-Thinker. However, the ESP32 TTGO T-Camera with OLED and PIR can be a better choice depending on your project requirements. Let’s take a quick look at the differences between each board.
Both come with the OV2640 camera and ESP32 chip (Wi-Fi, Bluetooth, BLE, and dual core).
The TTGO T-Camera comes with an OLED display and a PIR motion sensor. These peripherals can be very useful in surveillance and home automation projects. So, having everything on the same board can be very useful (instead of building the circuit yourself). Besides, it also adds a pushbutton connected to GPIO 34 that can trigger any task.
Uploading code is also easier with this board because it comes with a USB connector that can be used both for uploading code or for power. Alternatively, you can also power the board using a 3.7V lithium battery. It comes with 8MB PSRAM, while the AI-Thinker comes with 4MB PSRAM.
However, it doesn’t come with microSD card support, and it costs approximately twice the price of an ESP32-CAM AI-Thinker board.
Here’s a table comparing both boards:
| TTGO T-Camera ESP32 | ESP32-CAM (AI-Thinker) | |
| OLED Display | 0.96 inch OLED display | x |
| PIR Motion Sensor | ✓ | x |
| MicroSD Card Slot | x | ✓ |
| Built-in Programmer | ✓ | x |
| USB Input | ✓ | x |
| PSRAM | ✓ (8MB) | ✓ (4MB) |
| Battery Connector | ✓ | x |
| Exposed GPIOs | I2C GPIOs | ✓ |
| Trigger Button | ✓ | x |
| Price | $13 to $25 | $6 to $9 |
| Where to Buy? | Check prices | Check prices |
Wrapping Up
The ESP32 TTGO T-Camera is a very versatile ESP32 camera development board. If you want to have a general overview and compare other ESP32 camera boards, read this article: ESP32 Camera Dev Boards Review and Comparison (Best ESP32-CAM).
If you want to get one ESP32 TTGO T-Camera with PIR and OLED display, check the following links:

We hope you’ve found this review useful. You may also like the following resources:
- ESP32-CAM Camera Boards: Pin and GPIOs Assignment Guide
- Change ESP32-CAM OV2640 Camera Settings
- Build ESP32-CAM Projects (eBook)
- Read all our ESP32-CAM Projects, Tutorials and Guides
Thanks for reading.
[Recommended Course] Learn ESP32 with Arduino IDE
Register in our brand new ESP32 course with Arduino IDE. This is our complete guide to program the ESP32 with Arduino IDE, including projects, tips, and tricks! The registrations are open, so sign up now.
 [eBook] Home Automation using ESP8266 »
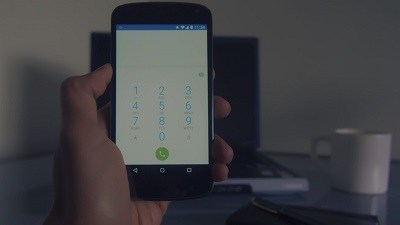 [Course] Build a Home Automation System »
 [Course] Arduino Step-by-Step Projects »
Leave a Reply