The TTGO T-Journal is a $15 ESP32 Camera Development Board. It features an OV2640 camera, an antenna, a 0.91 inch OLED display, some exposed GPIOs, and a micro-USB interface that makes it easy and quick to upload code to the board.
Comparing TTGO T-Journal with the ESP32-CAM (AI-Thinker), the only drawback is that it doesn’t come with a microSD card interface and it costs approximately twice the price.
However, if you don’t intend to use a microSD card in your projects, I would recommend the T-Journal because the micro-USB interface makes it much easier to prototype and the antenna guarantees a good Wi-Fi range. This means that you’ll have less lag in video streaming when compared with other boards without an antenna. Additionally, having a small OLED display is always useful.
Recommended reading: Getting Started Guide for TTGO T-Journal ESP32 Camera Development Board Project Examples (Video Streaming Web Server, Taking Photos, Camera Web Server, and Display Text in OLED Display)
Where to Buy?
You can get the TTGO T-Journal on different stores for approximately $15. Check the links below.
Watch the Video Review
You can watch the video review or continue reading for the written version.
TTGO T-Journal ESP32 Board Overview
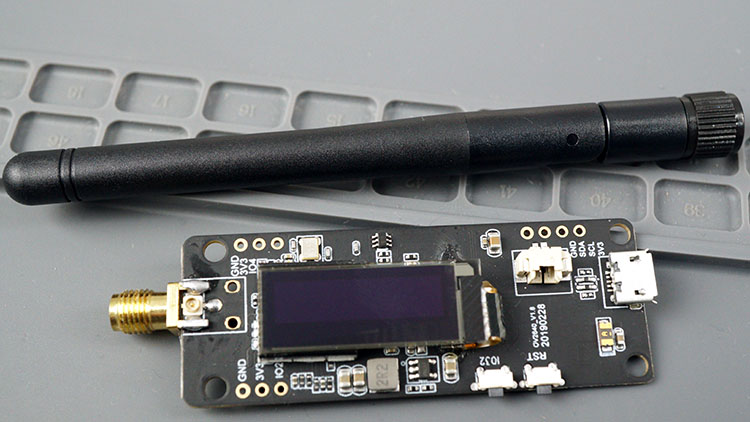
Here’s a summary of the most relevant T-Journal ESP32 Board hardware specifications:
- Chipset ESPRESSIF-ESP32-PCIO-D4 240MHz Xtensa® single-/dual-core 32-bit LX6 microprocessor
- FLASH QSPI flash/SRAM, up to 4 x 16 MBSRAM 520 kB SRAM
- Reset button and button on GPIO 32
- 0.91 inch SSD1306 OLED display
- Power indicator red LED
- USB to TTL CP2104 (you can upload code via USB cable)
- Camera OV2640 2 Megapixel
- Steering engine analog servo (comes with two sets of pins ideal to connect servos)
- Working voltage: 2.3V-3.6V
- Working current: about 160mA
- Size: 64.57mm x 23.98mm
Power supply specifications:
- Power Supply USB 5V/1A
- Charging current 1A
- Battery 3.7V lithium battery
Camera
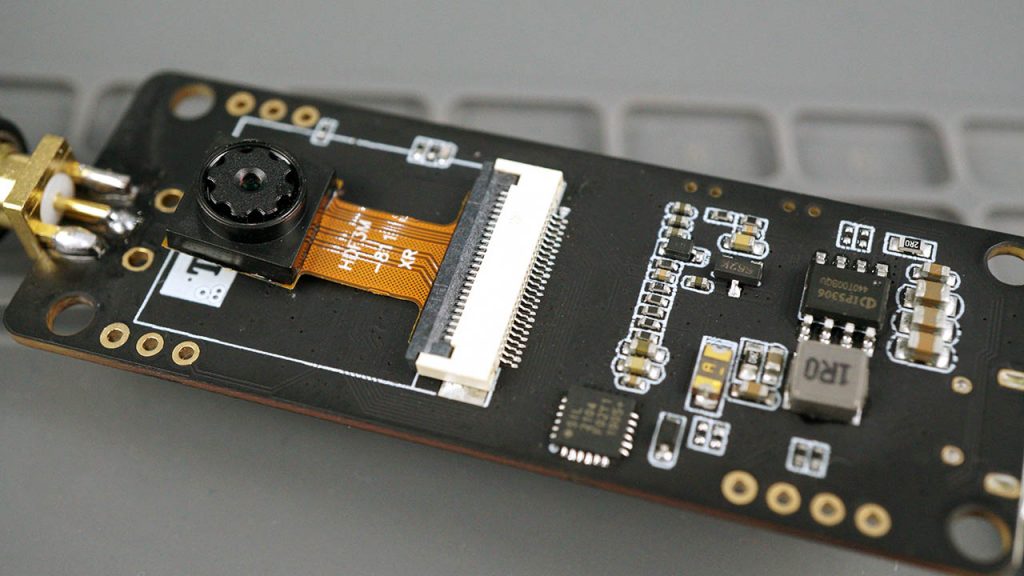
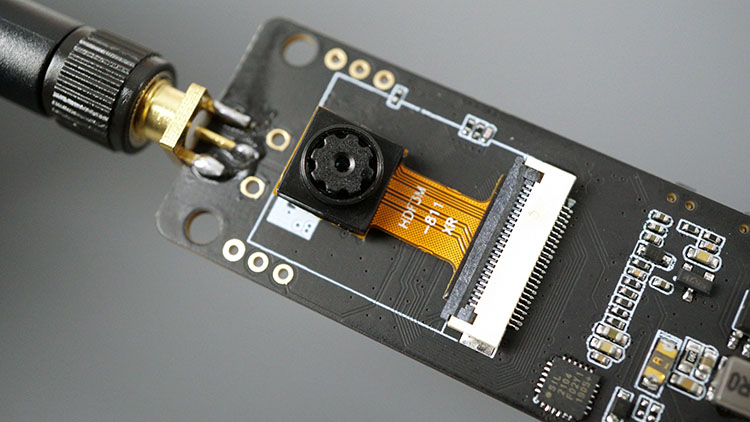
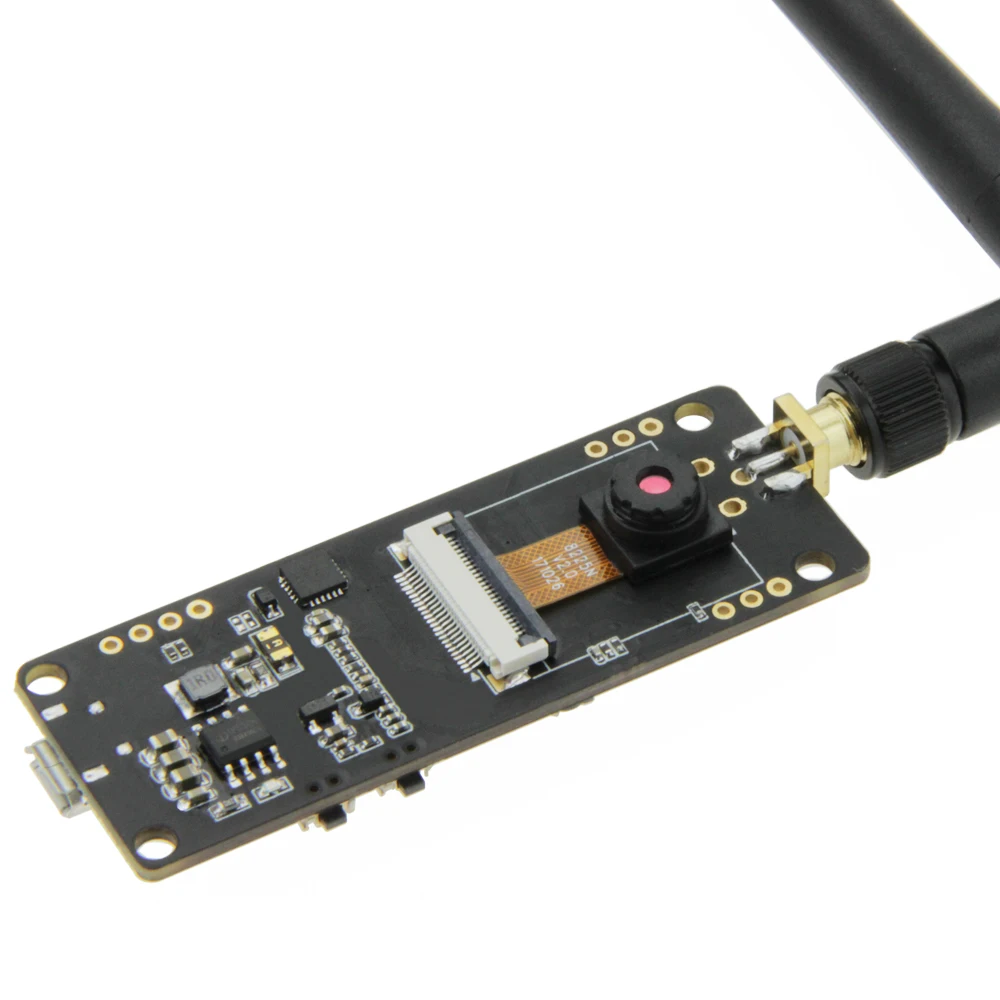
The following figure shows one of the sides of the board – the one with the camera. The camera is a 2MP OV2640 camera, which is the same camera that comes with the ESP32-CAM and other similar boards like the M5-Stack with a camera.
OLED Display
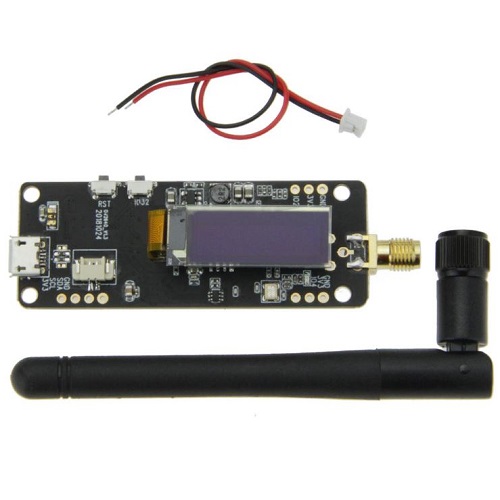
On the other side, there’s a small 0.91 inch SSD1306 OLED display that can display some information like the camera IP address or any errors while debugging, for example.
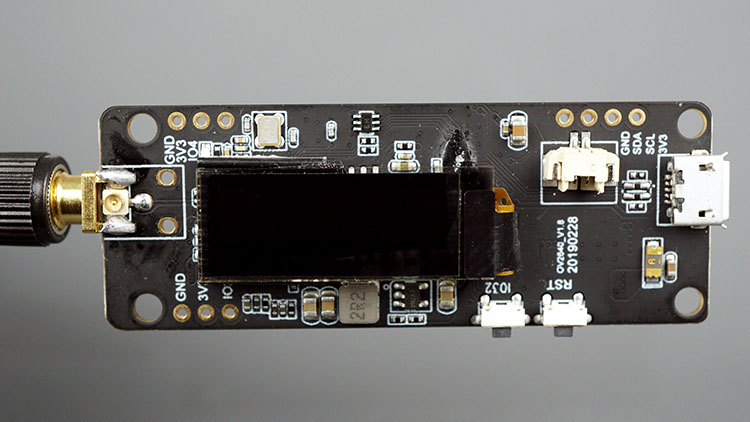
The OLED display comes with the SSD1306 driver, which means you can use the Adafruit SSD1306 or the oled-ssd1306 libraries.
The OLED is connected to GPIO 14 (SDA) and GPIO 13 (SCL). You can read this guide for the ESP32 with built-in OLED display that can also be applied to this display. You just need to change the pin definition and the display size on the code.
In my opinion, it would be better to have the OLED display and the camera on the same side, but that’s how they can keep such a small footprint.
GPIOs
The board comes with some exposed GPIOs like GPIO 2, GPIO 4, GPIO 14 and GPIO 13 and some power pins with 3.3 V and GND.
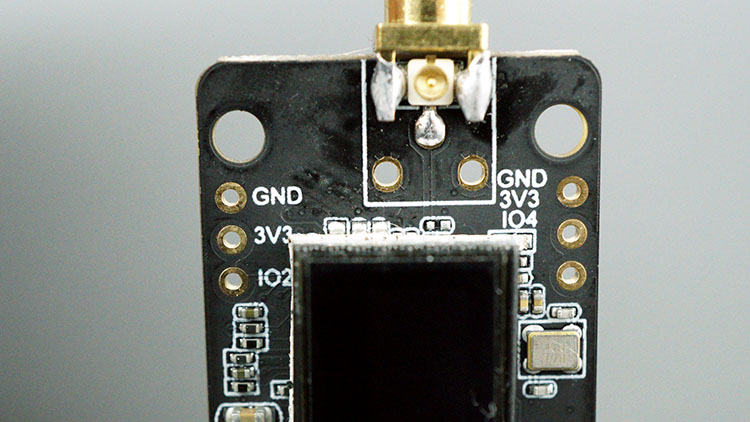
At the top, you have two sets of pins that are ideal to connect two servo motors. At the top right you have: GND, 3V3, GPIO 4, and at the left there’s GND, 3V3, GPIO 2. These pins are in the exact order to connect servo motor pins (GND, Power, Signal).
Those pins GPIO 4 and GPIO 2 can also be used to connect other peripherals.
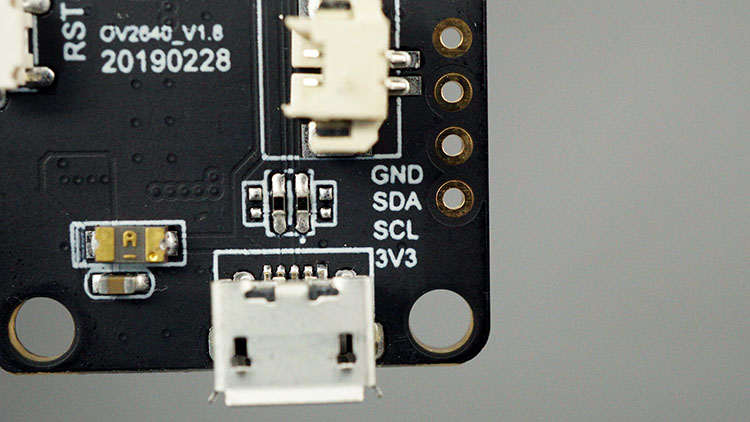
GPIO 14 and GPIO 13 are being used as I2C pins by the OLED display. You can use these pins to connect other peripherals that also use the I2C communication protocol. You can read our guide about I2C with the ESP32 to learn more about interfacing several peripherals on the same I2C bus.
If you’re not using the OLED display, you can use those pins as you like. You can set them as outputs, for example, to trigger something like a relay module. Learn how to control a relay module with the ESP32:
Power Supply
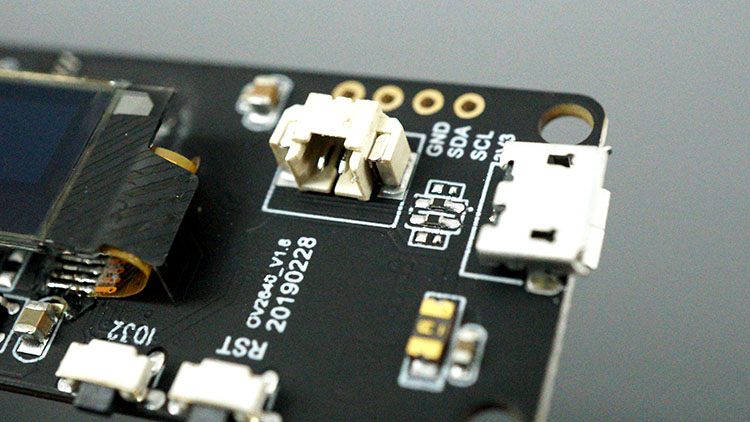
The T-Journal ESP32 camera development board can be powered via USB cable (5V 1A) or a 3.7V lithium battery – it comes with a battery connector.
Buttons
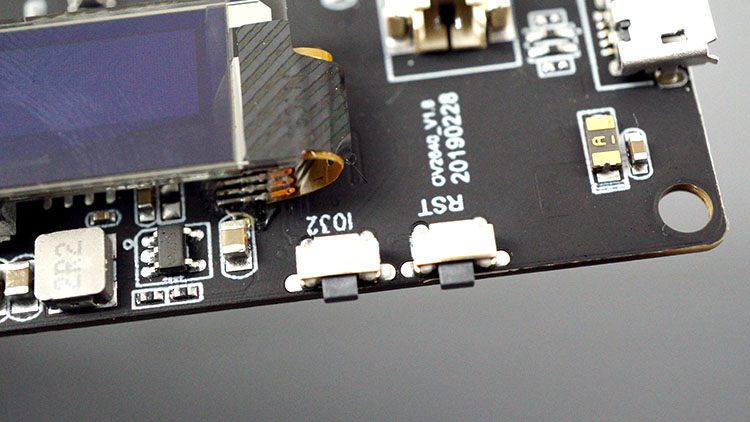
This board comes with a RESET button and a button attached to GPIO 32. The RESET button, as the name suggests, resets the board. The button that connects to GPIO 32 can be used to trigger any task that you want – like taking a photo when you press that button, for example.
TTGO T-Journal ESP32 Board Pinout
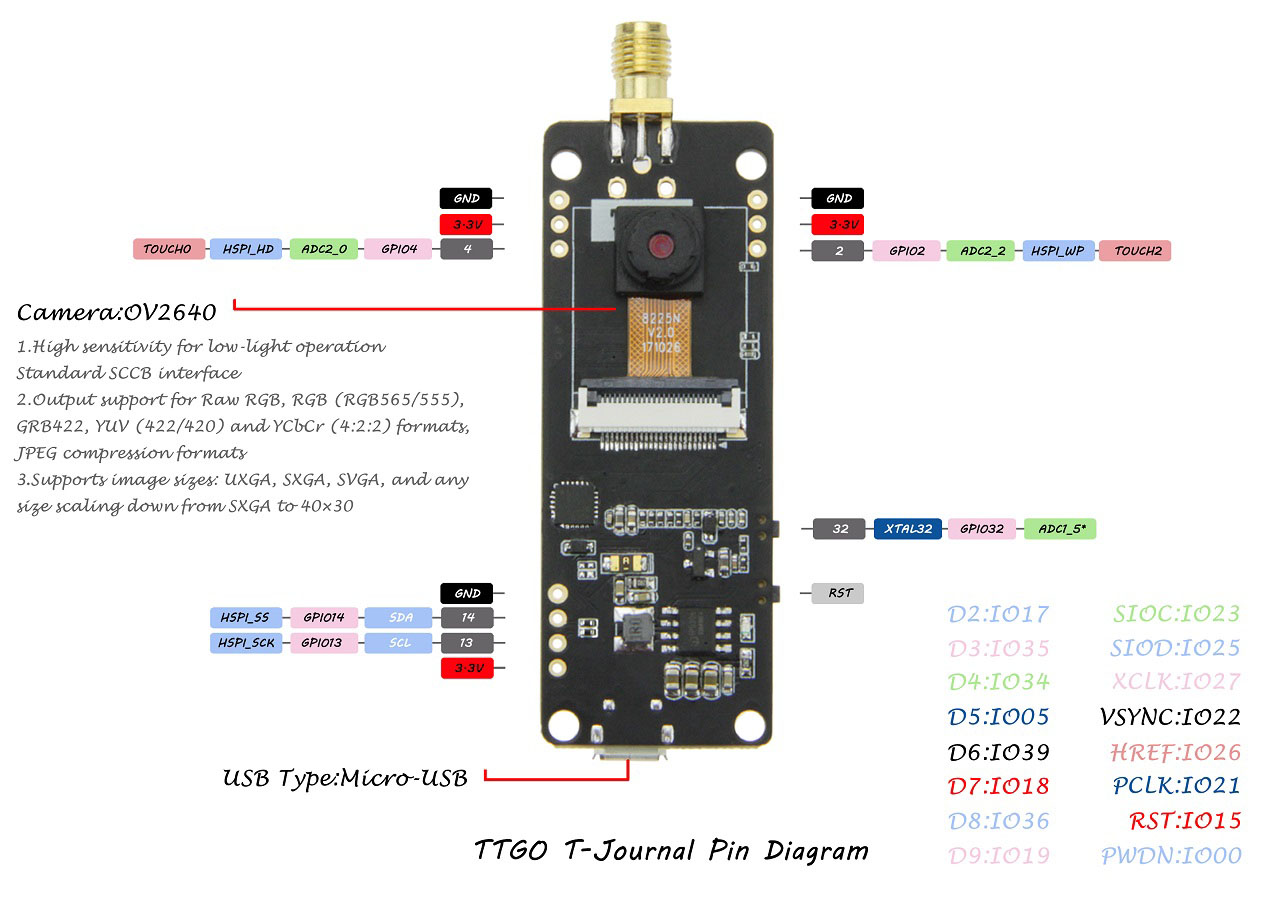
The following image describes the TTGO T-Journal ESP32 board pinout. You can click the image to enlarge.
TTGO T-Journal ESP32 Board Camera Connections
Here’s the connections between the ESP32 and the camera:
| OV2640 Camera | ESP32 |
| D2 | GPIO 17 |
| D3 | GPIO 35 |
| D4 | GPIO 34 |
| D5 | GPIO 5 |
| D6 | GPIO 39 |
| D7 | GPIO 18 |
| D8 | GPIO 36 |
| D9 | GPIO 19 |
| SIOC | GPIO 23 |
| SIOD | GPIO 25 |
| XCLK | GPIO 27 |
| VSYNC | GPIO 22 |
| HREF | GPIO 26 |
| PCLK | GPIO 21 |
| RST | GPIO 15 |
| PWDN | GPIO 0 |
It’s important to make sure that the pin definition in your code matches your camera board pinout. Otherwise, your camera will not work.
TTGO T-Journal ESP32 Board OLED Connections
The OLED that comes with this board uses I2C communication protocol. Here’s the connections:
| OLED | ESP32 |
| SDA | GPIO 14 |
| SCL | GPIO 13 |
Testing the TTGO T-Journal ESP32 Camera
The TTGO T-Journal board comes with an example flashed. It creates an access point that you can access on your smartphone or computer to watch video streaming.
Power the ESP32 through the USB cable (you can just connect it to a USB port in your computer for testing purposes).
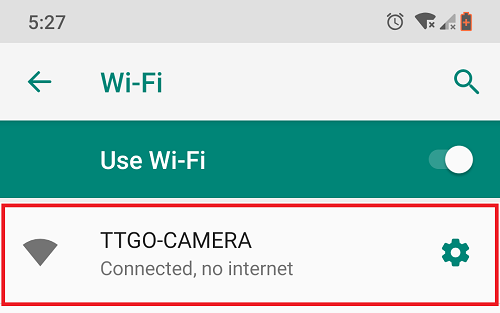
Go to your smartphone Wi-Fi settings, and there should be an ESP32 wireless network called TTGO-CAMERA. Connect to that network.
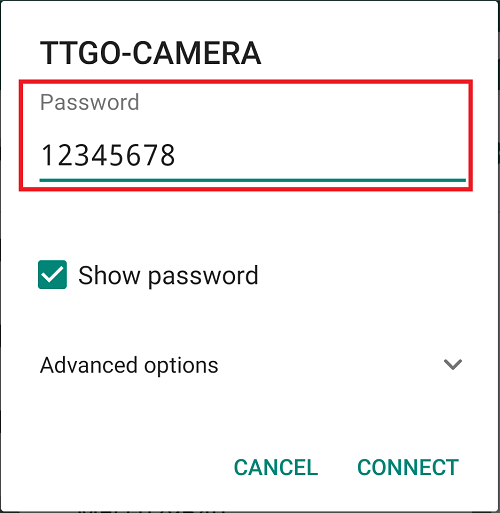
The default password is 12345678.
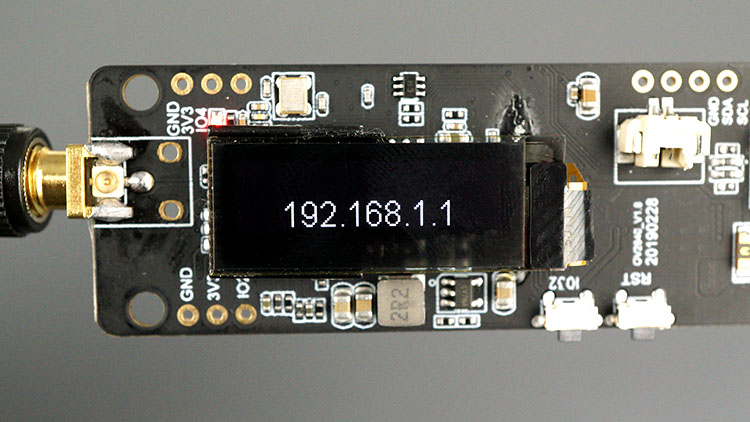
While connected to the TTGO-CAMERA network, open your browser and type the IP address that shows up on the OLED display.
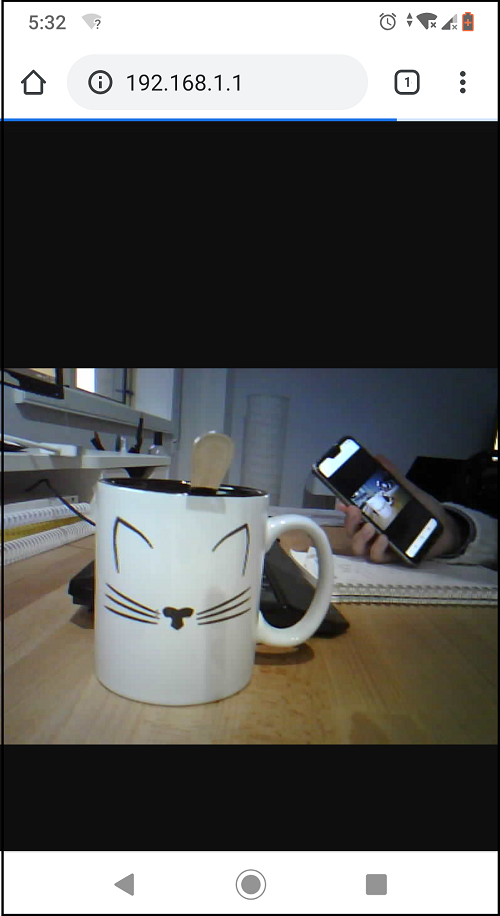
You should see a video streaming of the camera. The video streaming examples works pretty well even when you move the camera.
Getting Started with the T-Journal ESP32 Camera
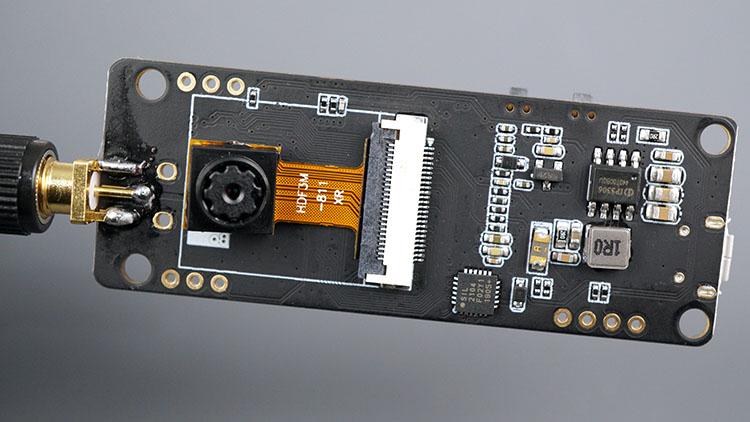
Like the ESP32-CAM (AI-Thinker), the T-Journal can be programmed using Arduino IDE. Because both boards use the OV2640 camera, the ESP32-CAM projects (that don’t use an SD card) should be compatible with the T-Journal. You just need to change the camera pins definition.
Read our TTGO T-Journal ESP32 Camera getting started guide and start making your own projects:
You can also check the examples on the TTGO T-Journal GitHub page.
TTGO T-Journal vs ESP32-CAM (AI-Thinker)
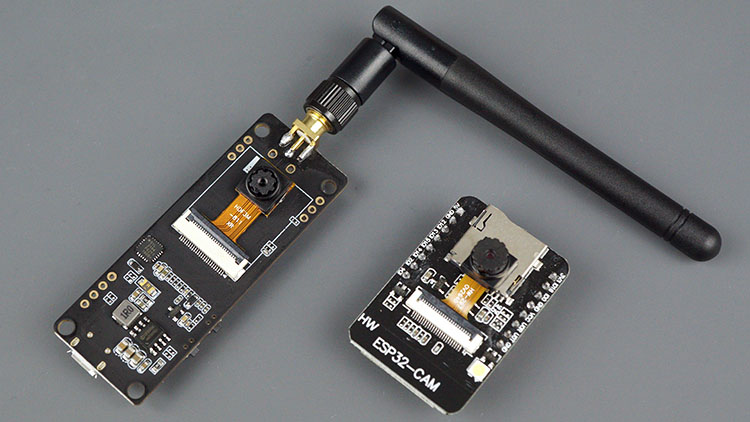
At this point, you should be wondering whether you should get a TTGO T-Journal or an ESP32-CAM (AI-Thinker).
Both boards are very similar, they come with the OV2640 camera, and ESP32 chip (which means you have Wi-Fi, Bluetooth, and dual-core).
The T-Journal comes with an OLED display and four GPIOs exposed (two of them are perfect for connecting servo motors). This board also comes with a connector to connect a 3.7V lithium battery. Uploading code is also easier with this board because it comes with a USB connector that can be used both for uploading code or for power. However, it doesn’t come with microSD card support, and it costs twice the price of an ESP32-CAM board. It doesn’t have PSRAM, which means it can’t run code for face detection and recognition.
On the other side, the ESP32-CAM (AI-Thinker) comes with microSD card support which can be very useful to save photos, settings, data logging, etc. It comes with an external 4M PSRAM allowing you to run face recognition and detection code.
When you’re not using the microSD card, you have more pins that you can use to connect other peripherals. One of the biggest drawbacks of the ESP32-CAM is that you need an FTDI programmer to upload code, which is more time consuming and more prone to error.
| TTGO T-Journal ESP32 | ESP32-CAM (AI-Thinker) | |
| OLED Display | ✓ | x |
| MicroSD Card Slot | x | ✓ |
| Built-in Programmer | ✓ | x |
| USB Input | ✓ | x |
| PSRAM | x | ✓ (4MB) |
| Battery Connector | ✓ | x |
| Exposed GPIOs | ✓ | ✓ |
| Trigger Button | ✓ | x |
| Price | $12 to $17 | $6 to $9 |
| Where to Buy? | Check prices | Check prices |
The best board for you will depend on the projects you want to build. Anyway, you can order one T-Journal and one ESP32-CAM (AI-Thinker) and test both boards yourself.
Wrapping Up
The TTGO T-Journal ESP32 Camera development board is another ESP32 with a camera. It works pretty well, and it is very easy to upload code (compared with the ESP32-CAM). Both boars have advantages and disadvantages. Now, you choose which board is better for your project requirements. If you want to experiment with the TTGO T-Journal, check the links below to get one.
We hope you’ve found our review/overview of the TTGO T-Journal ESP32 Camera Board useful. You can download project examples on the RNT blog:(Video Streaming Web Server, Taking Photos, Camera Web Server, Display Text in OLED Display).
You might like reading:
Thanks for reading.
[Recommended Course] Learn ESP32 with Arduino IDE
Register in our brand new ESP32 course with Arduino IDE. This is our complete guide to program the ESP32 with Arduino IDE, including projects, tips, and tricks! The registrations are open, so sign up now.


 [eBook] Home Automation using ESP8266 »
 [Course] Build a Home Automation System »
 [Course] Arduino Step-by-Step Projects »
Leave a Reply