In this post we’re going to take a look and review a XR2206 Function Generator DIY kit. A function generator can be an expensive piece of hardware, specially for electronics hobbyists or beginners. But fortunately, there are really cheap DIY kits like the one we’re going to show you that can be handy for beginners and electronics enthusiasts.
Recommended reading: DSO150 Digital Oscilloscope Review
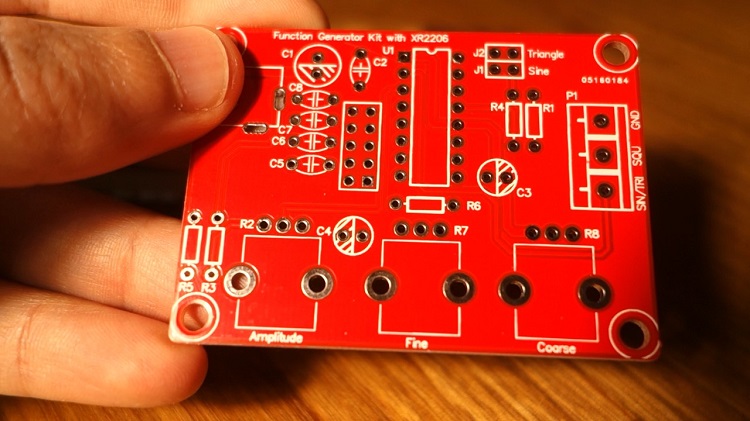
XR2206 Function Generator Kit Features
The XR2006 function generator kit can produce signals within the range of 1Hz to 1MHz with adjustable amplitude. Here’s the most relevant features of this kit:
- It’s based on the XR2206 chip;
- Frequency range: 1Hz-1MHz
- Adjustable amplitude and adjustable frequency
- Power supply: 9-12V (not included)
Where to Buy?
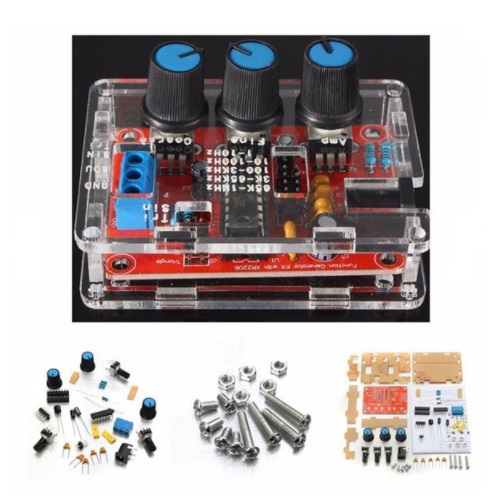
The XR2206 Function Generator DIY kit costs around $4 to $12. We’ve gotten our kit from eBay. It is also available at Banggood, or Amazon.

Unboxing XR2206 Function Generator DIY Kit
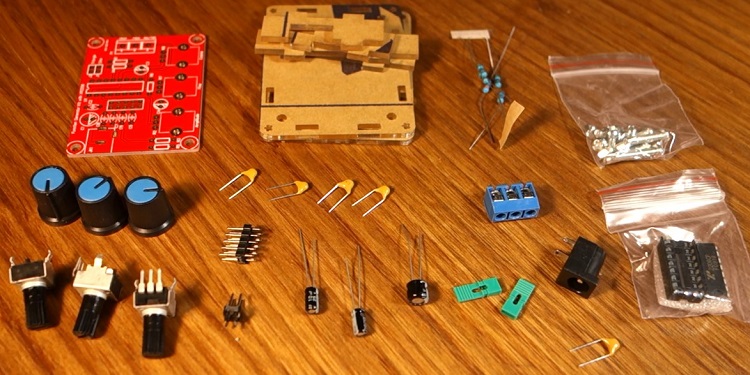
When you get your Function Generator Kit, you’ll find a plastic bag with everything that you need:

- A PCB;
- Acrylic parts for assembling a case;
- A bag with electronics components;
- And an instructions manual.
The figure below shows all the parts that come with the kit.
This kit comes just with though-hole components. This means they are easy to solder to the PCB, even if you don’t have much experience soldering. Additionally, there are labels on the PCB that show where you should solder each component.
You might like: Best Soldering Irons for Beginners
Assembling the XR2206 Function Generator DIY Kit
Assembling the function generator kit is a straightforward task. You just need to solder some components. Start by soldering the shorter components, and then the taller ones. This will make the soldering work easier.
Start by soldering the resistors:
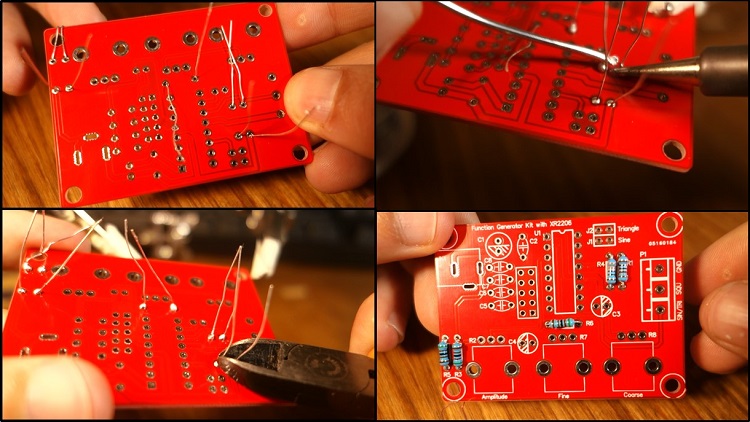
- Identify each resistor value using a multimeter or a resistor color chart.
- Check the instructions manual to identify the label for each resistor
- Place the resistors on the PCB
- Solder the resistors to the PCB
- Cut the leads at the back
Next, solder the electrolytic capacitors. Note that these capacitors have polarity. The white band on the capacitor should be place on the white half circle as shown in the figure below.
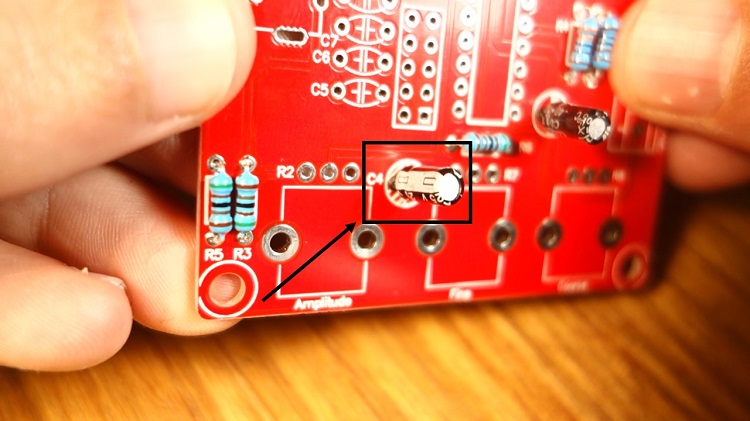
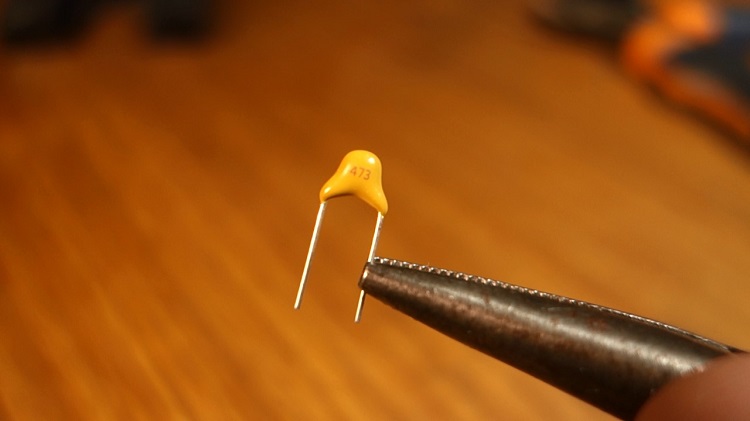
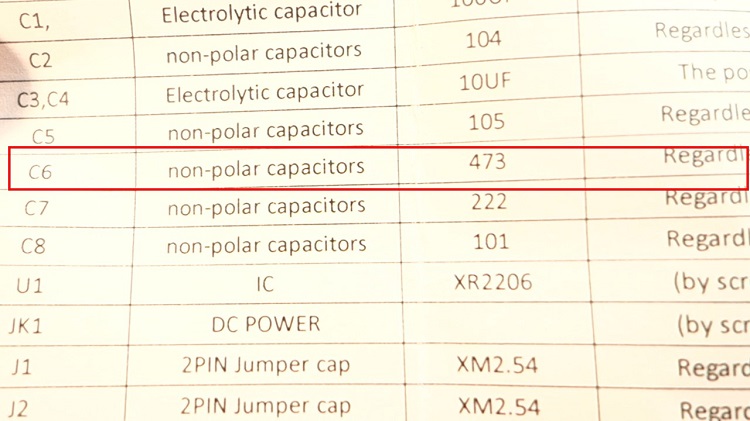
The next step is soldering the ceramic capacitors. These capacitors have a number that identifies them.
Check them against the instructions manual to see where they should be located on the PCB. For example, this ceramic capacitor should be placed in the C6 label, as shown below.
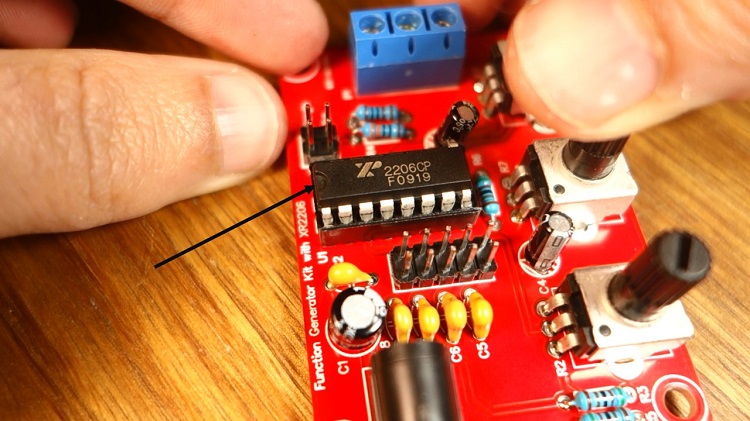
Finally, solder the remaining parts. Be careful when attaching the XR2206 chip. Make sure the half circle is placed in the right orientation, as shown in the figure below.
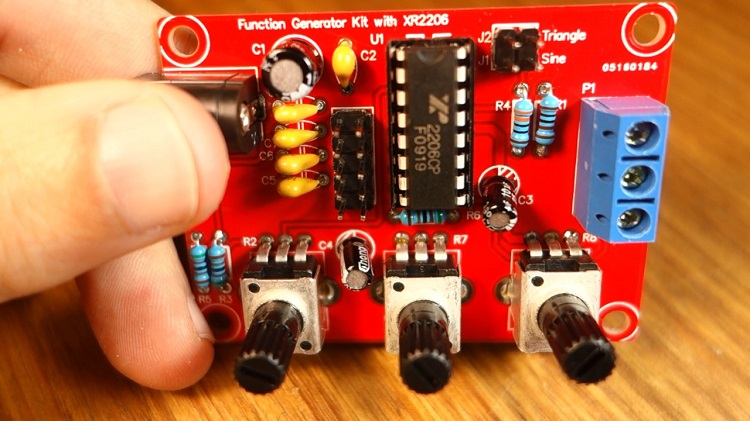
At the end, here’s how your PCB should look like:
Assembling the Acrylic Case
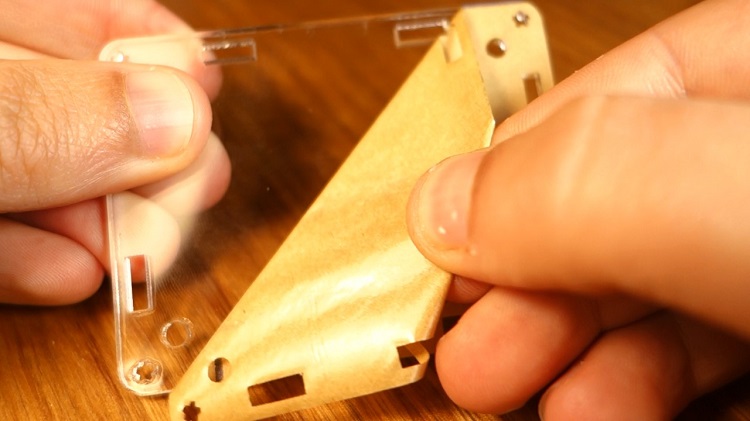
The kit comes with acrylic parts to build a case. Although the case is not difficult to assemble, it can be a bit tricky to put everything in place.
Start by removing the protective adhesive tape before assembling the parts. Otherwise, it will be more difficult later.
The screws that come with the kit are a bit small and it will seem they don’t fit on their place, but they do. You need to make some pressure to pull the screws down. This task is a bit difficult.
Alternatively, you can use hot glue to make the parts stick together.
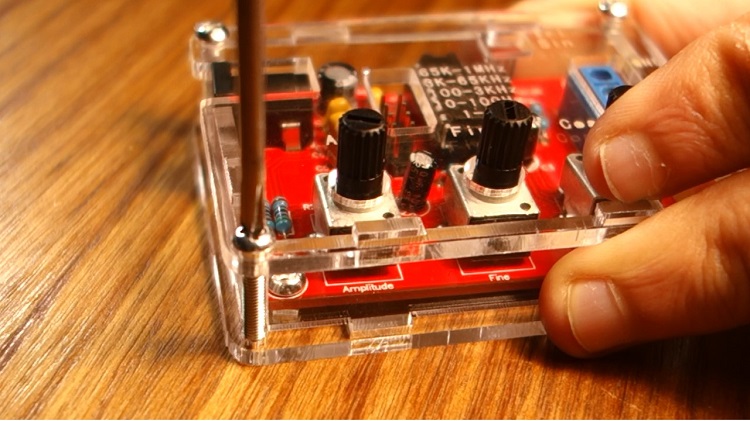
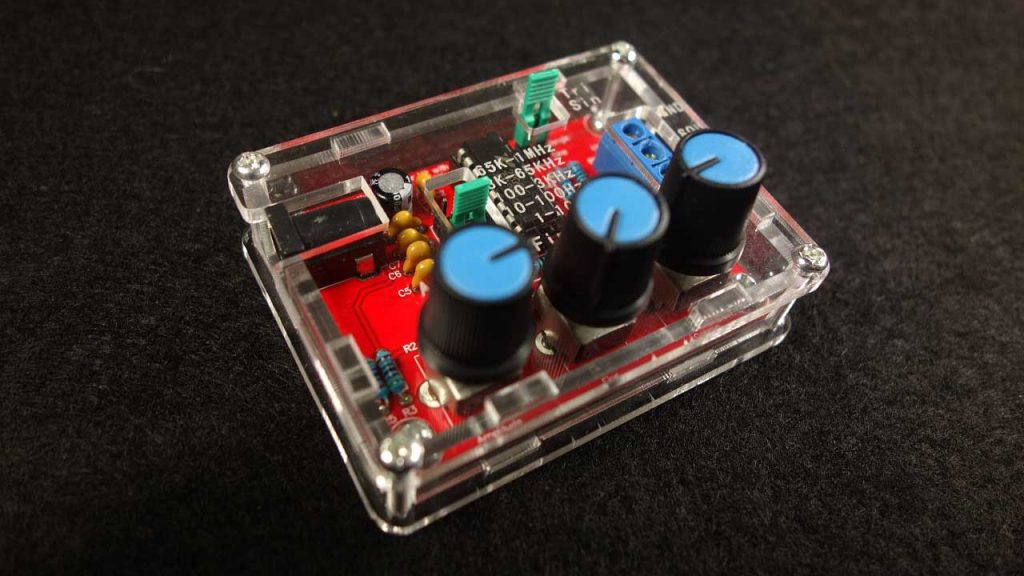
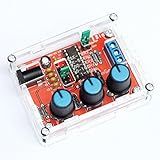
After assembling the kit, here’s what you should get:
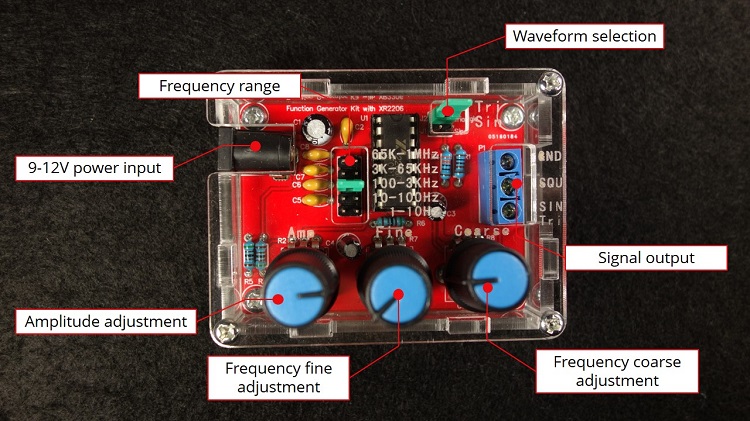
The frequency generator comes with three knobs. One for amplitude adjustment, and other two for fine and coarse frequency adjustment. There’s a jumper cap you need to change place to select a frequency range. The other jumper cap should be placed correctly accordingly to the signal you’re getting at the output.
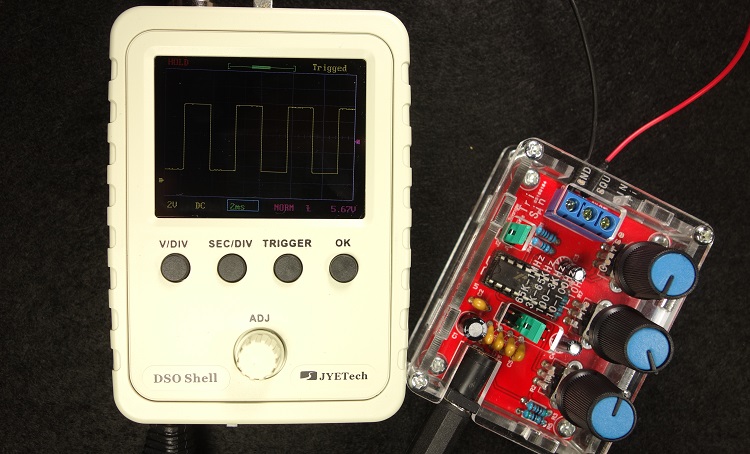
Testing the XR2206 Function Generator DIY Kit
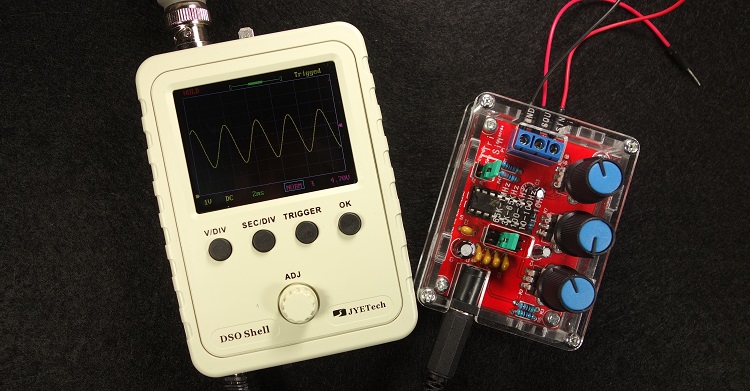
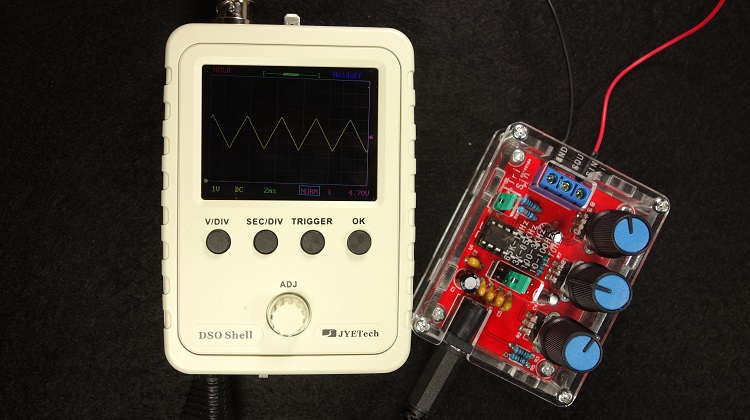
Let’s test the function generator. Apply a 9 to 12V power supply. You need an oscilloscope to test this kit. We’ve tested it using the low-cost DSO150 digital oscilloscope.
The function generator performed quite well producing sinusoidal, square and triangular signals.
Here’s the sinusoidal wave.
And the triangular signal.
When testing the kit, we’ve noticed that you can’t adjust the amplitude for the square wave.
Wrapping Up
In summary, this is a good piece of hardware given its price. For less than $10 dollars you can get a function generator with amplitude and frequency adjustment. The cheapest kit we’ve found costs around $4 on eBay.
The XR2206 function generator DIY kit is great for electronics hobbyists for repairing and debugging circuits, and for learning purposes. The kit comes with through-hole components, and it is easy to solder and assemble. You can have it built in approximately half an hour.
However, keep in mind that it doesn’t replace a “real” function generator. If you’re a professional or a scientist, you should get a high-end function generator.
One major drawback of this kit is that it doesn’t come with a display. So, you don’t know the values for the parameters you’re setting. You need an oscilloscope to see the waves you’re generating. An oscilloscope can be an expensive tool, but there are also low-cost DIY oscilloscopes that are suitable for hobbyists, like the DSO150 digital oscilloscope.
Nonetheless, this is a great kit that you can use to generate different signals: sinusoidal, square, and triangular with adjustable frequency and amplitude.
We hope you’ve found this review useful. We have other reviews that you might like:
- FY6800 2-Channel DDS Arbitrary Waveform Signal Generator Review
- DIY Transistor Tester Kit Review
- JYETech DSO150 Digital Oscilloscope Review
- 8x8x8 LED Cube DIY Kit – How To Build and Review
- 7 DIY LED Kits You’ll Be Proud of Building
[Recommended Course] Learn ESP32 with Arduino IDE
Register in our brand new ESP32 course with Arduino IDE. This is our complete guide to program the ESP32 with Arduino IDE, including projects, tips, and tricks! The registrations are open, so sign up now.

Other RNT Courses
 [eBook] Home Automation using ESP8266 »
Build IoT projects and home automation gadgets with the ESP8266 Wi-Fi module.
 [Course] Build a Home Automation System »
Build a home automation system using open-source hardware and software.
 [Course] Arduino Step-by-Step Projects »
Build 25 cool Arduino projects with our course even with no prior experience!
Leave a Reply